Building an Atreus
May 31, 2015
I’ve always been obsessed with keyboards. The first large purchase I made when I had a “real job” was a matte black Das Keyboard Ultimate with MX Cherry Blue switches. That keyboard has been with me for years now and its served me well.
Recently I’ve been having issues with RSI so I decided to see if I could find an ergonomic keyboard. After doing some research I decided to check out the Atreus. The Atreus was designed by Phil Hagelberg (aka. Technomancy) as a portable replacement for the Ergodox. Its a 40% keyboard but features the same “columnar layout” that the ergodox does. The portable design was appealing since I knew that I was going to be carrying my keyboard back and forth from the office every day.
Phil offers a kit with everything that you need to put an Atreus together including a printed circuit board and case. However, there was going to be some lead time before the kit came in. So since the Atreus is open source I decided to source the parts and assemble a kit myself.
Sourcing the parts
Finding an up to date list of all of the parts actually took a bit of work (and digging through many geekhack threads.) However, I was eventually able to come up with a complete list:
| Qty. | Item Name | Cost | Link |
|---|---|---|---|
| 50 | MX cherry clear switches | $62.00 | digikey |
| 50 | Diodes 1n4148 | $2.50 | digikey |
| 1 | Base blank DSA keycap set | $25.00 | Pimp My Keyboard |
| 1 | Teensy 2 | $16.00 | teensy |
| 1 | Case materials | $20.00 | ponoko |
| 1 | USB micro cable | $6.99 | Amazon |
| 1 | MX Red or MX Black switches | $8.50 | mechanicalkeyboards |
| 1 | additional 1.5x DSA keycap | $6.00 | Pimp My Keyboard |
Total Cost: $146.99
You’ll also need a soldering iron, hot glue gun, and some small gauge wire (a multi-meter would also be helpful but isn’t a requirement). I already had the tools so I didn’t include them in my costs.
Case
The case was the trickiest piece to figure out. Phil provides a wooden case in his kit. However, since I was sourcing my own parts I had to find a way to fabricate a case. I found a solution in this geekhack thread. It turns out that there is a great service called ponoko which will laser cut materials for you. In the atreus repo there is a ready-for-ponoko.svg. You simply upload that file to ponoko and select your material.
The ponoko file is designed to work with 3.2mm 24x12 birch plywood. The plywood is a great material; its cheap, lightweight, easy to work with, and gives the keyboard a really unique look.
A wooden keyboard case was appealing but in the end I decided to go with a 3mm clear acrylic. It was a bit more expensive then the wooden option and it (obviously) doesn’t hide any crimes you might commit with a soldering iron or hot glue gun. But I was really pleased with the end result.
Whatever material you end up getting make sure that its at least 3mm thick. You could theoretically get away with a thinner material but if you’re going to be soldering together everything point to point the way that I did then you’ll have to be precise. Otherwise you may have trouble getting everything to fit inside the case.
Switches
Keyboard switches are one of the great debates in the hacker world. I knew that I was going to be using this in the office so while my personal favorite switches are browns I picked up some mx cherry clears for the sake of my co-workers.
I cannot emphasize how much I regret this decision.
Some people really like the stiffer feel of the clears. I am not one of those people. I personally find them so stiff that they start to hurt my hands after a while. If I was building a second keyboard then I would definitely go with browns and just add o-rings. Switches are totally subjective so you should pick up a keytester and try some out before you make a decision.
Keycaps
There is some debate about the benefits of DCS vs DSA keycaps for the Atreus. Since I hadn’t used one before I decided to go with a DSA set since those are what come in the kit. The flatter profile of the DSA caps works very well with Atreus layout. I kept things simple (and cheap) and just picked up the a matte black set from pimpmykeyboard. If you’re feeling creative then you should play around with other colors on http://www.keyboard-layout-editor.com/#/
Microcontroller
You can use either the A* micro or the teensy. While the A* is more supported I decided to go with the teensy since I had experience with them.
Assembly
The assembly instructions are well documented on the Atreus site. You should refer there for specifics. But I thought that I would highlight some of my experience.
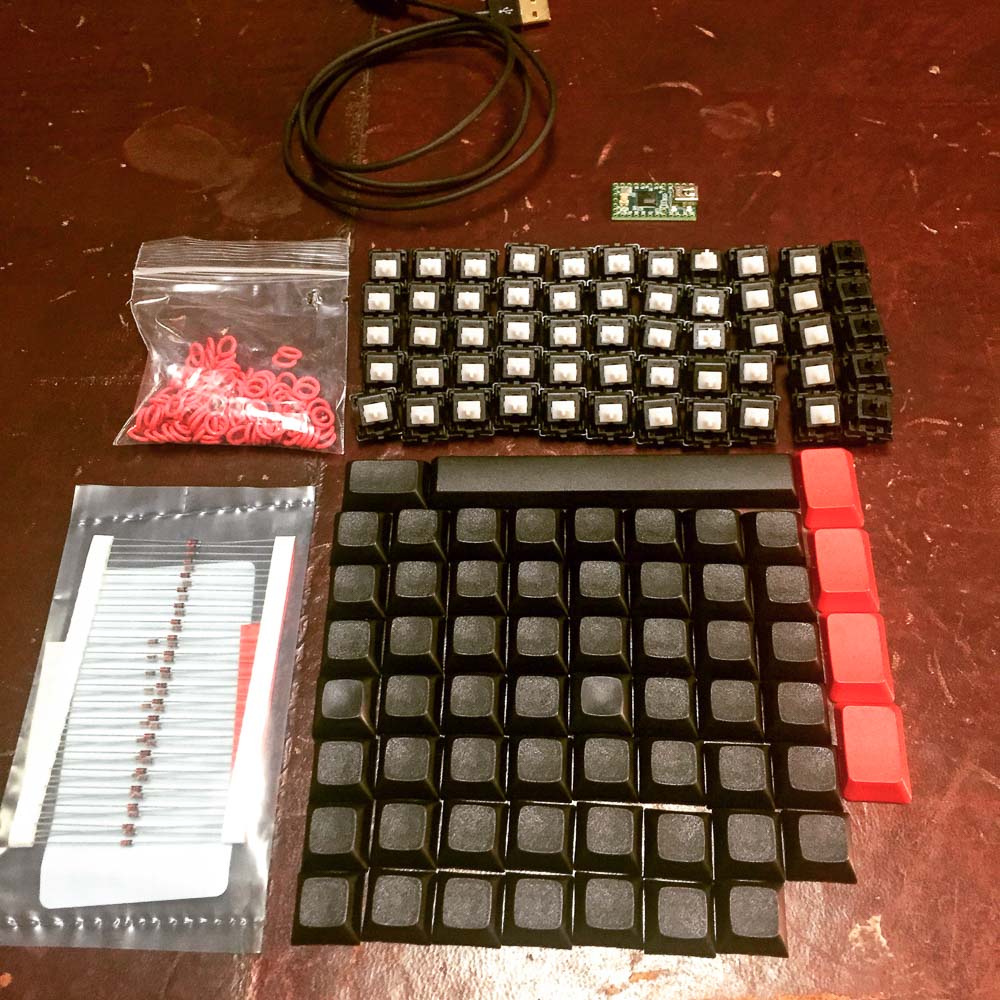
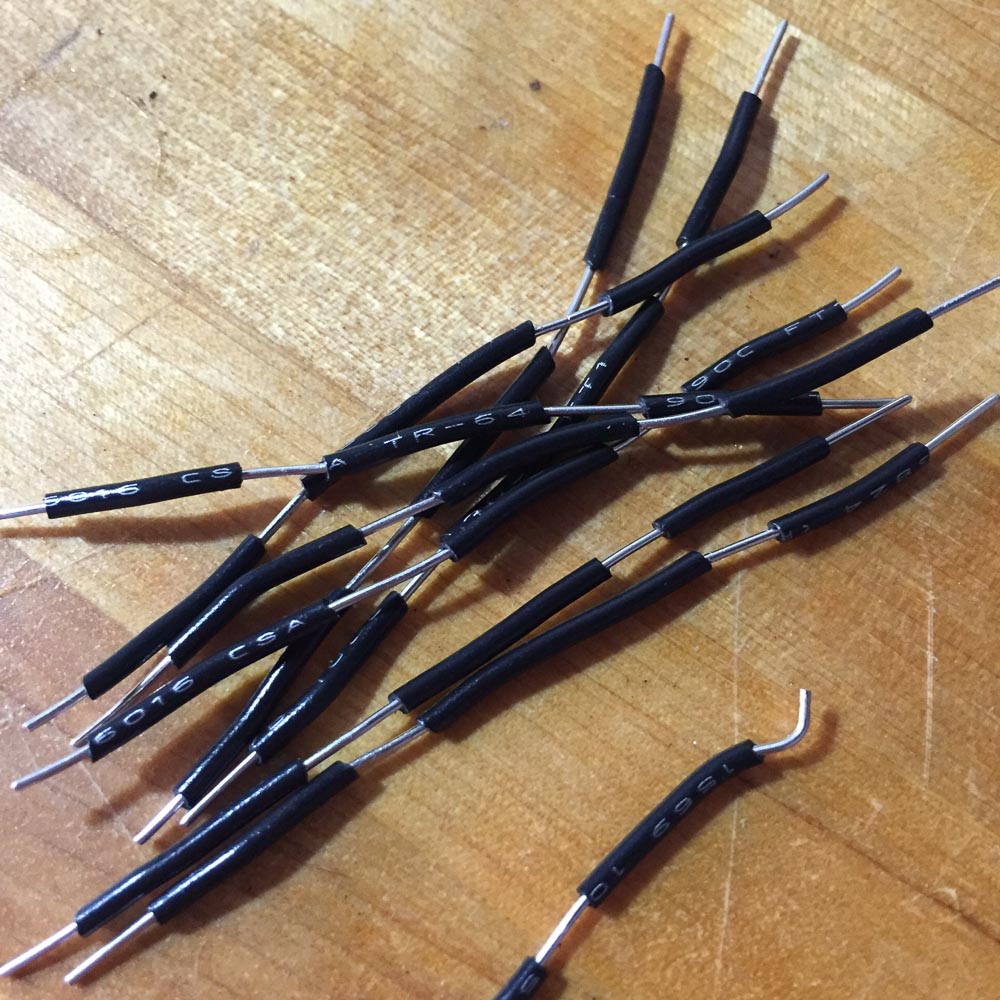
Everything layed out, keyboard in potentia.
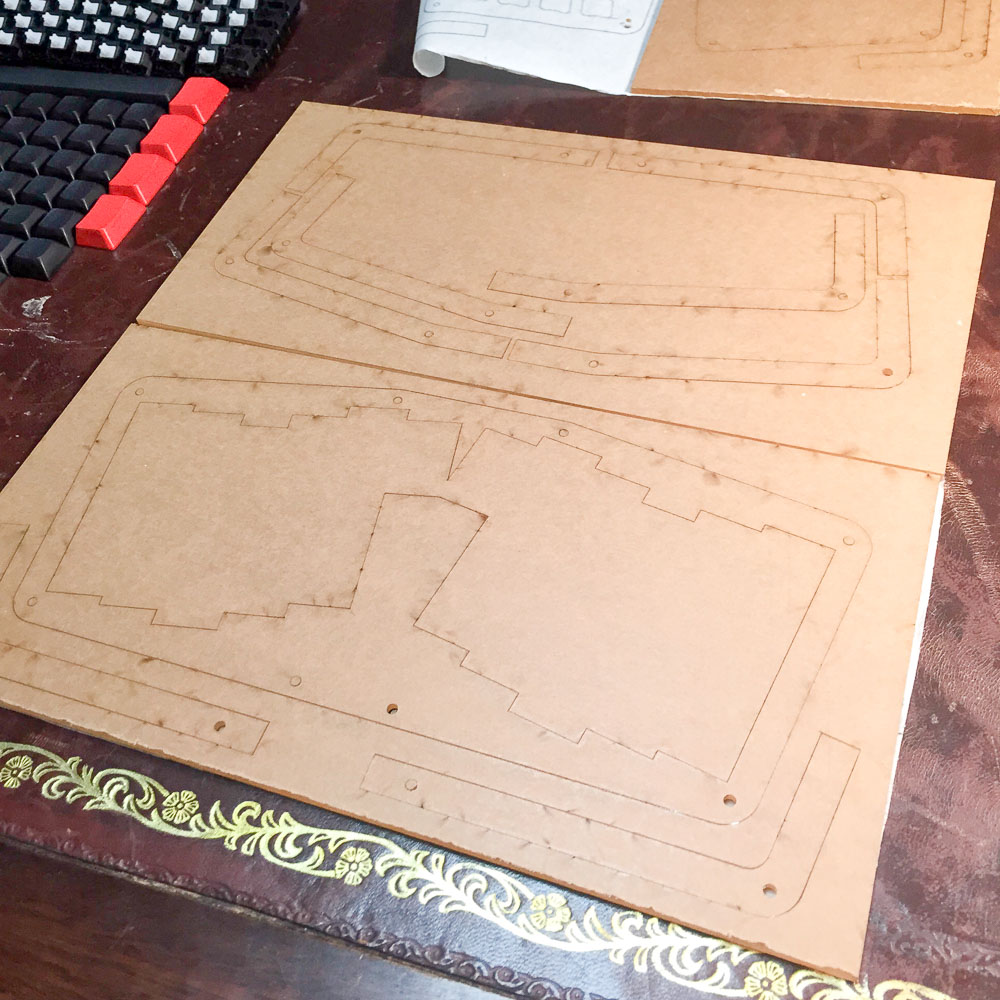
The sheets of acrylic come from ponoko still wrapped in their original paper. There was a lot of extra scrap from the larger acrylic sheet.
 The individual pieces were easy enough to separate from the rest of the scrap. I kept the paper on for as long as possible to avoid scratches.
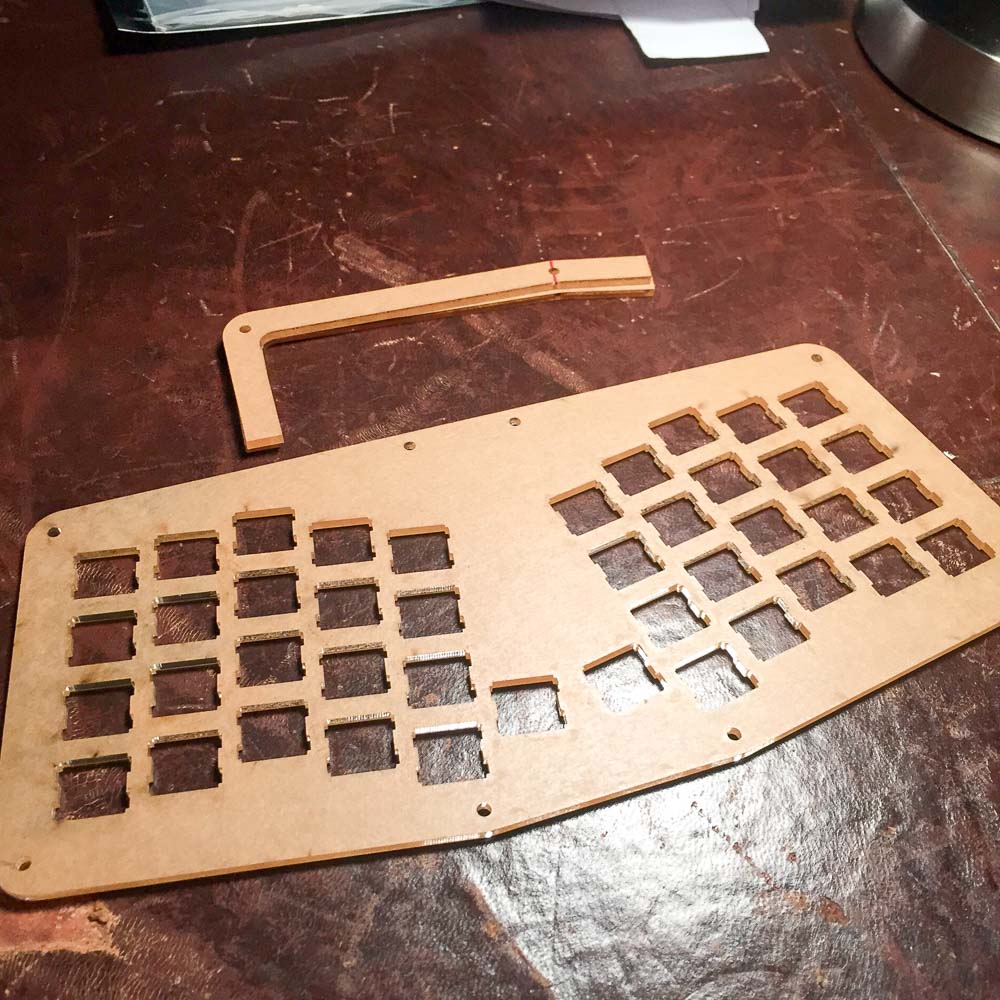
 I couldn’t resist doing a dry run just to see how it would all fit together.
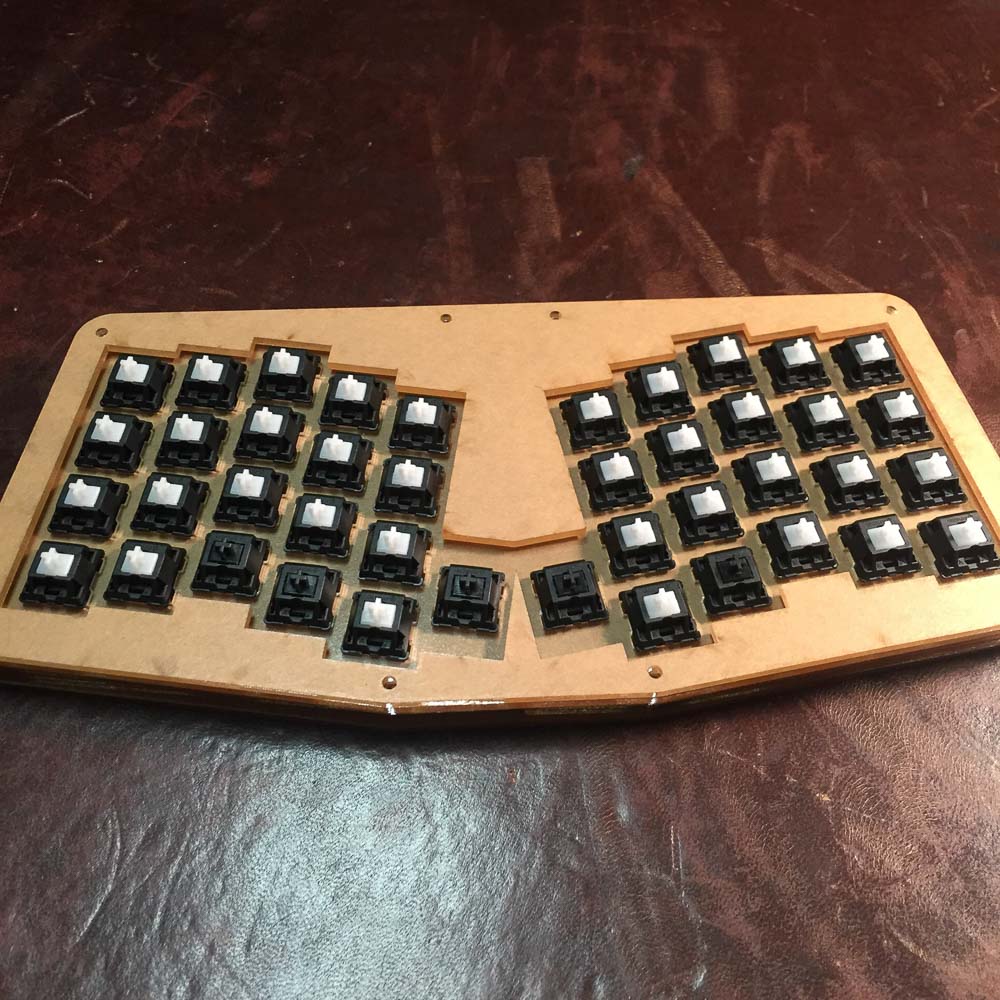
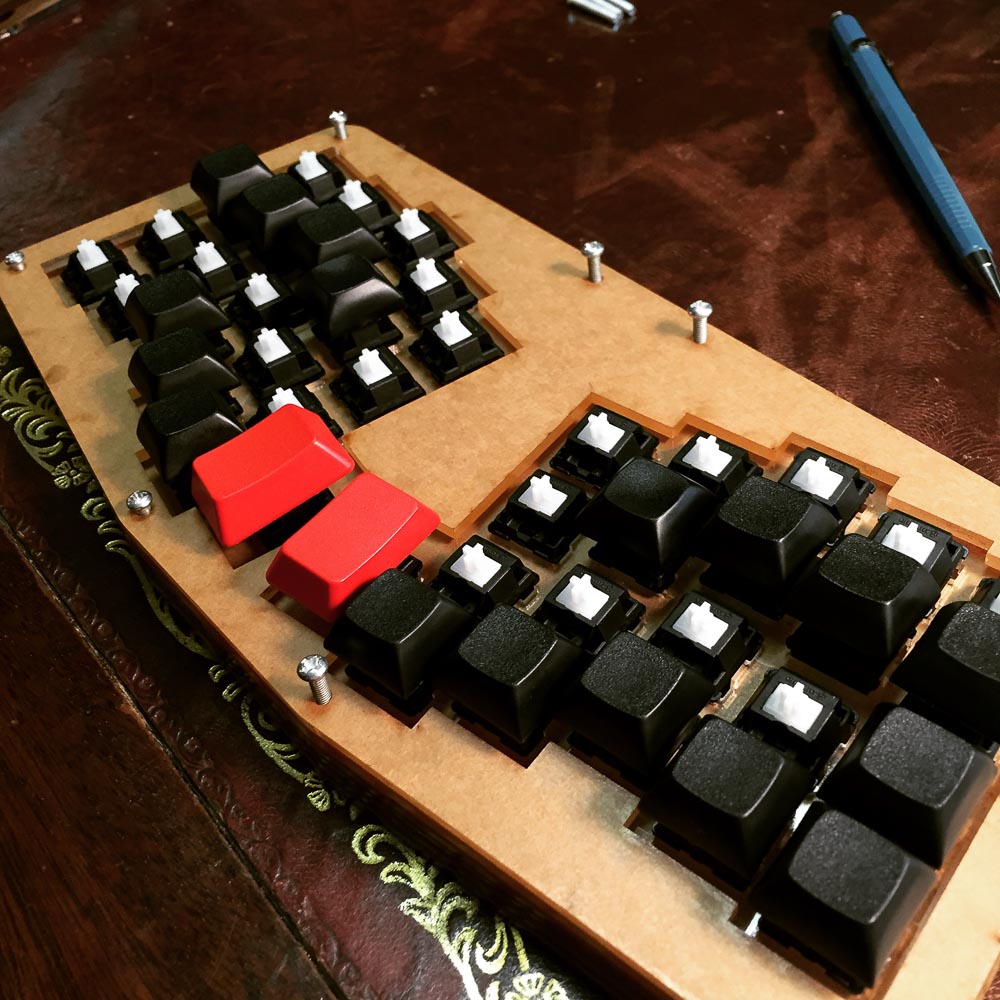 Tested out a few of the keycaps. I started to suspect that the keys would be too stiff but unfortunately I attributed it to the newness of the switches.
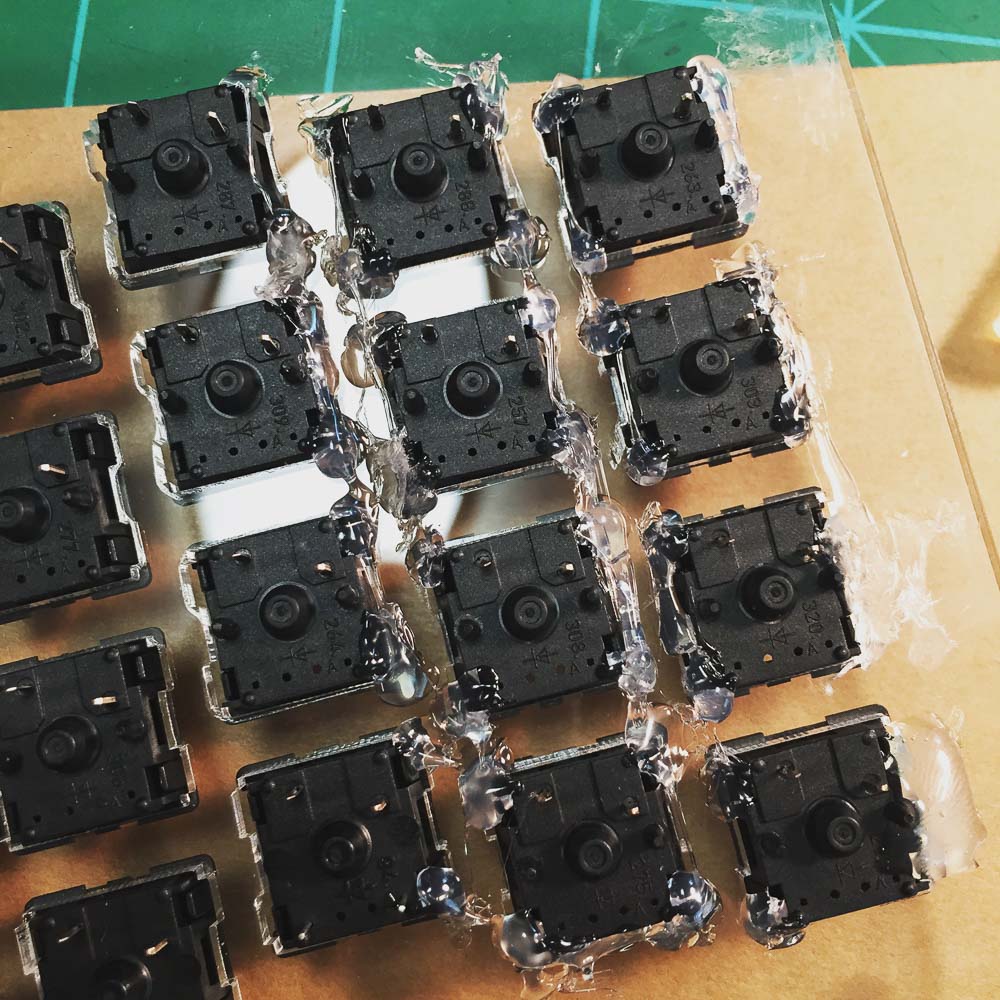 First step is to get everything hot glued into place. This helps hold everything together while you’re soldering and provides support once the keyboard has been assembled. Once I started laying down glue I realized 2 things.
1) I’m not great at hot glue
2) You can’t hide how bad you are at hot glue with clear acrylic.
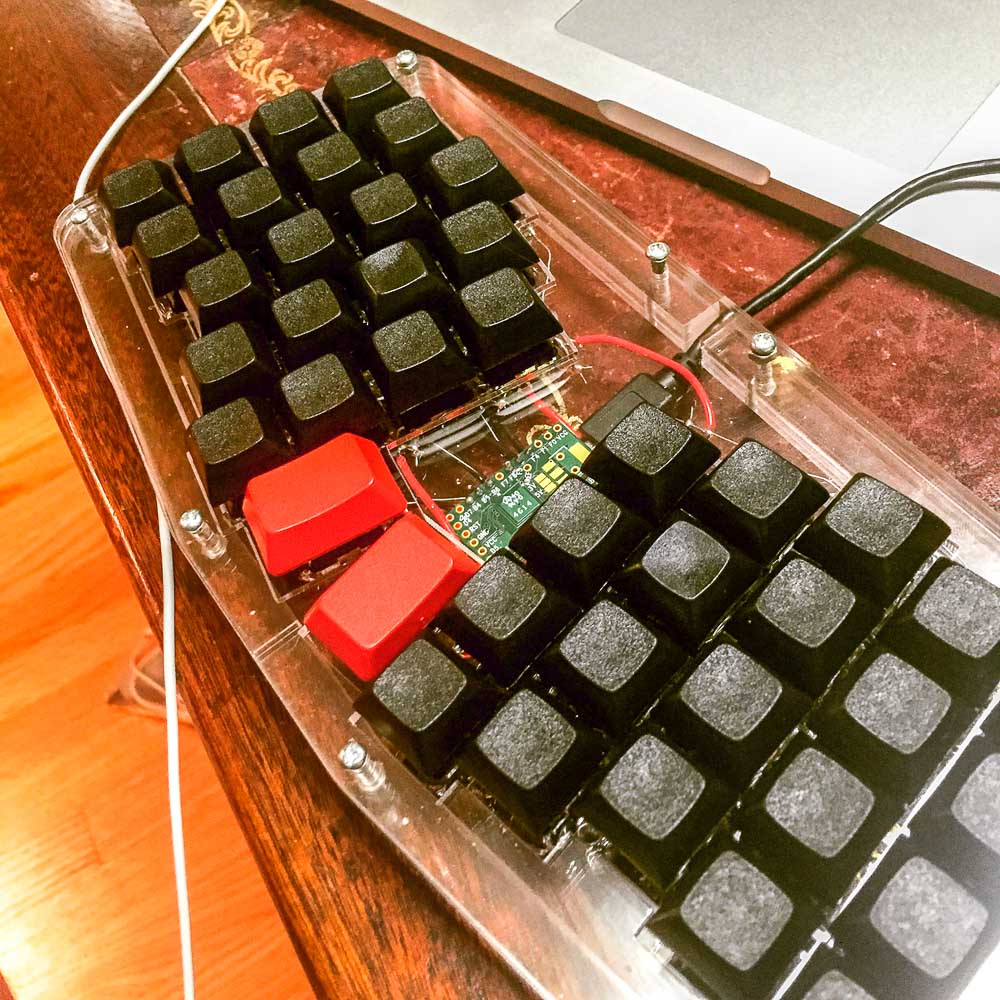
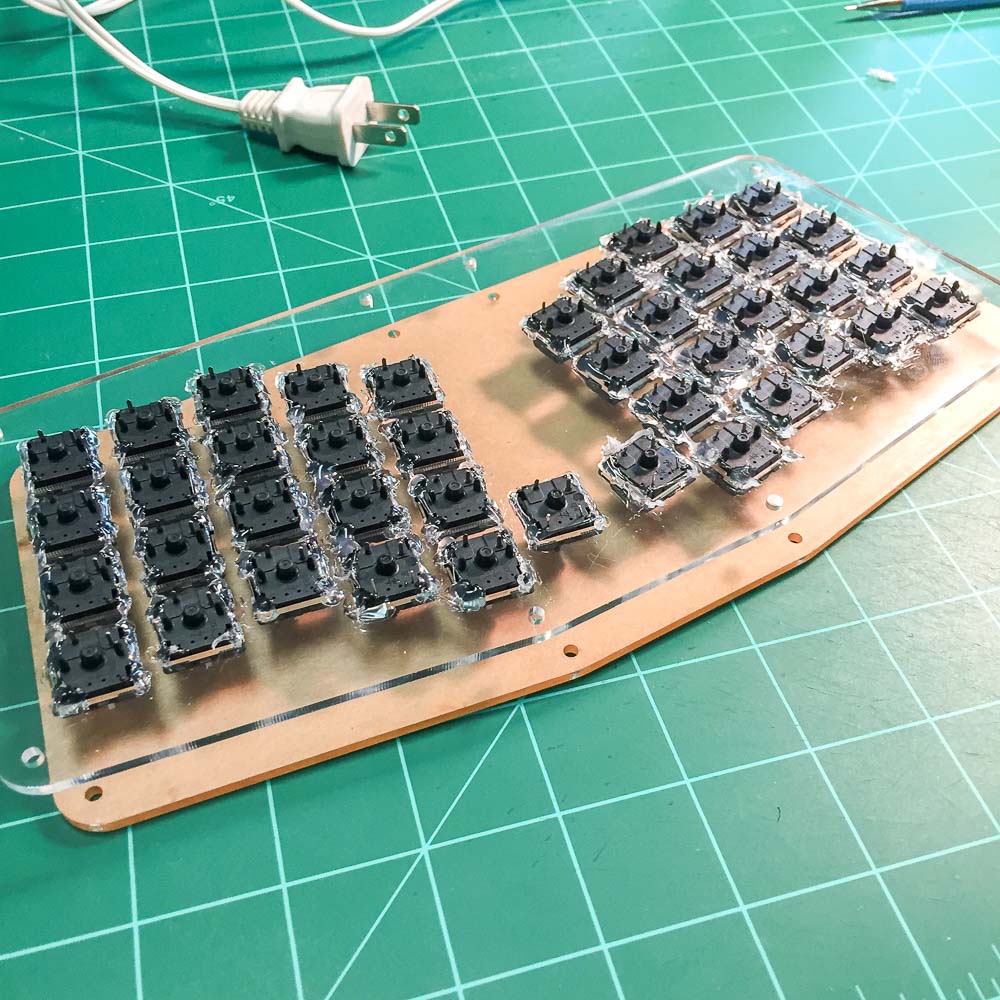 Once the switches were hot glued into place it was time to start soldering.
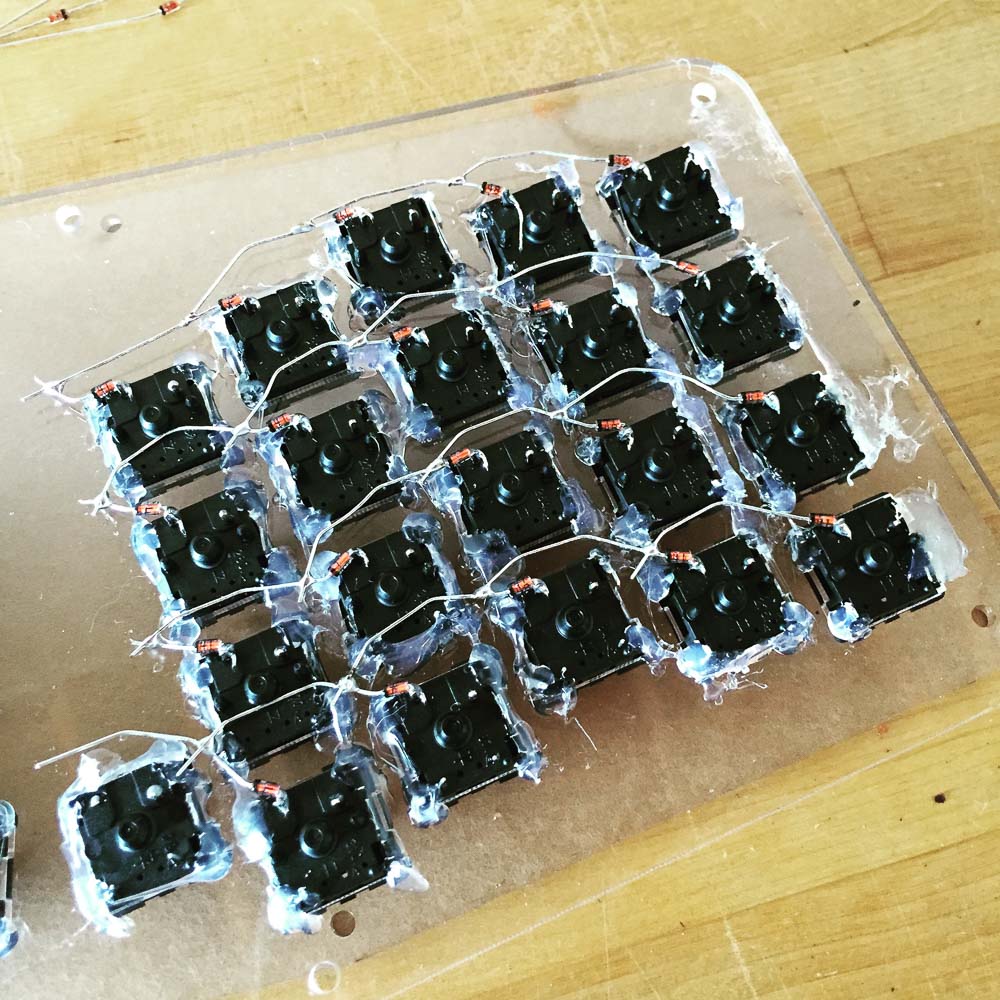 I started on all of the rows, soldering each diode point to point. The soldering isn’t incredibly difficult but you do need to make sure that you keep things tidy. Otherwise you’ll have issues getting everything to fit once the case is on.
 Oh the joys of stripping wire. Seriously this is the worst part of the whole thing. The PCB that comes with the kit eliminates all of this pain, but if you source everything yourself then you’ll need to strip a wire for each column.
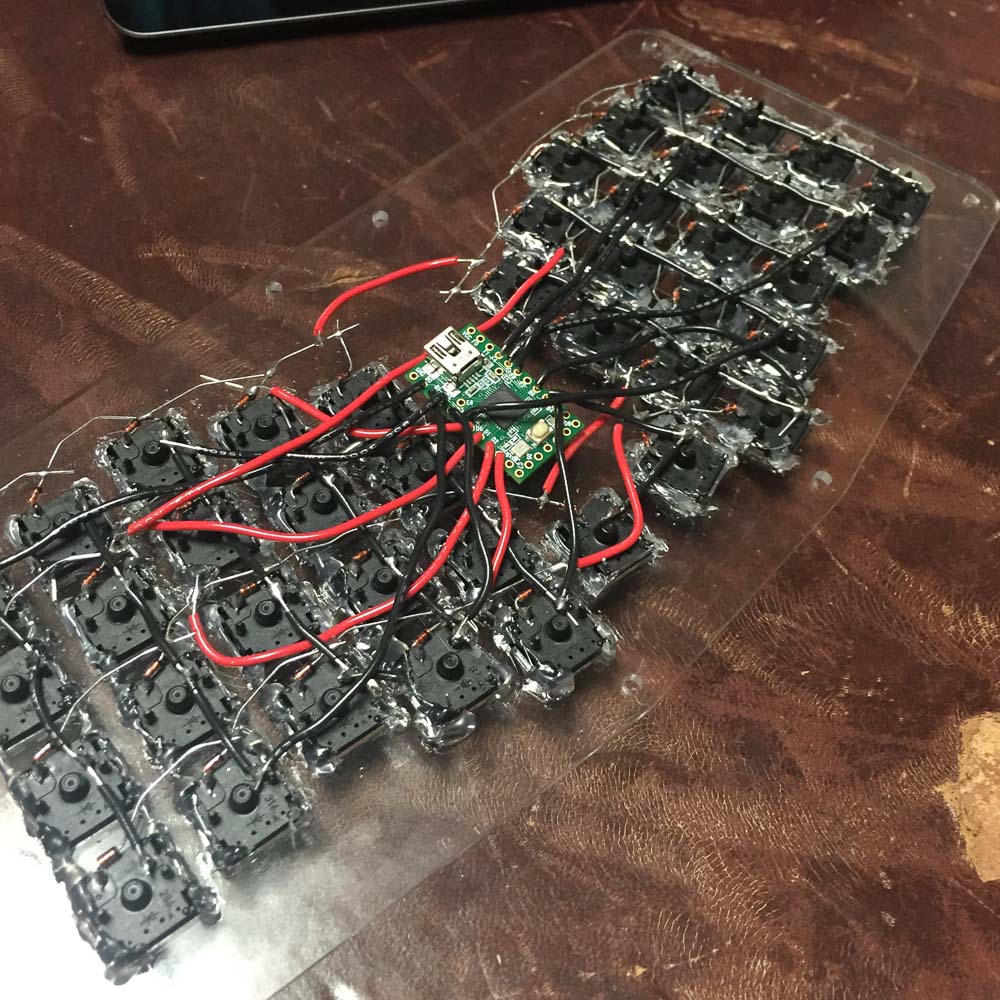
 After stripping all the wires I soldered in all of the columns. You’ll also have to make sure that the wire’s insulation covers any diode leads so you don’t create a short. There’s a good example of this in the switch on the top left switch. The wire insulation doesn’t quite cover the lead.
 Last step is to solder in the controller. The wires can come off of any row in the column so try to optimize your paths as best as you can to avoid excess.
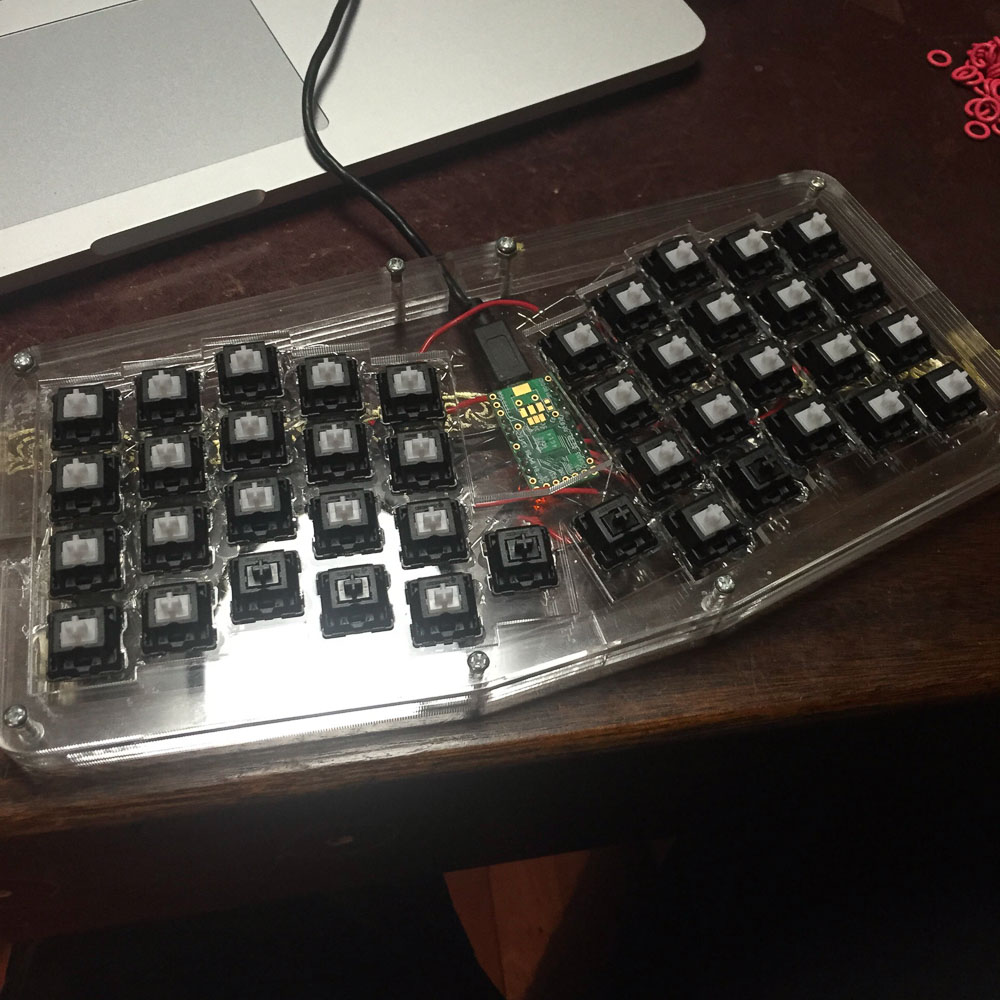 Once the soldering was done and I’d checked everything with a multimeter I closed up the case and gave it a try.
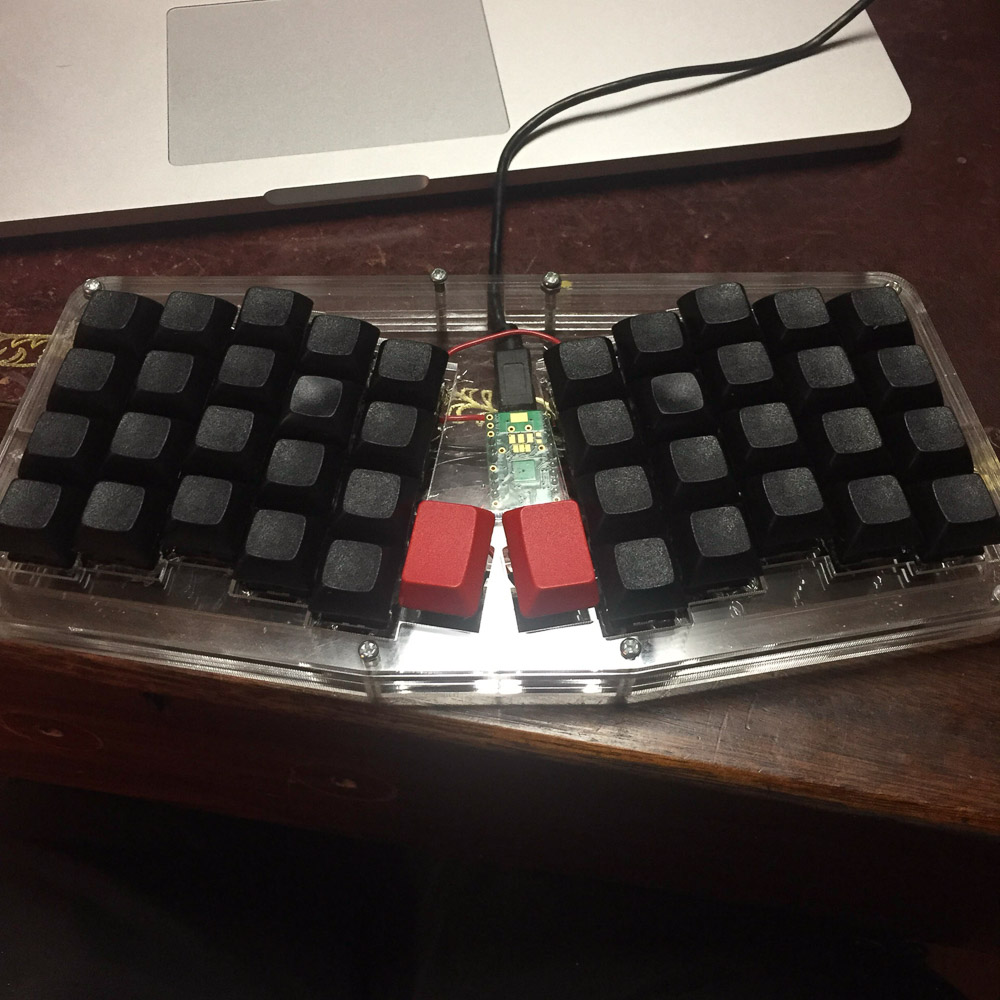 Luckily for me my board worked the first time so I threw on the keycaps.
 The clear acrylic ended up with a few scratches but overall I love the look.
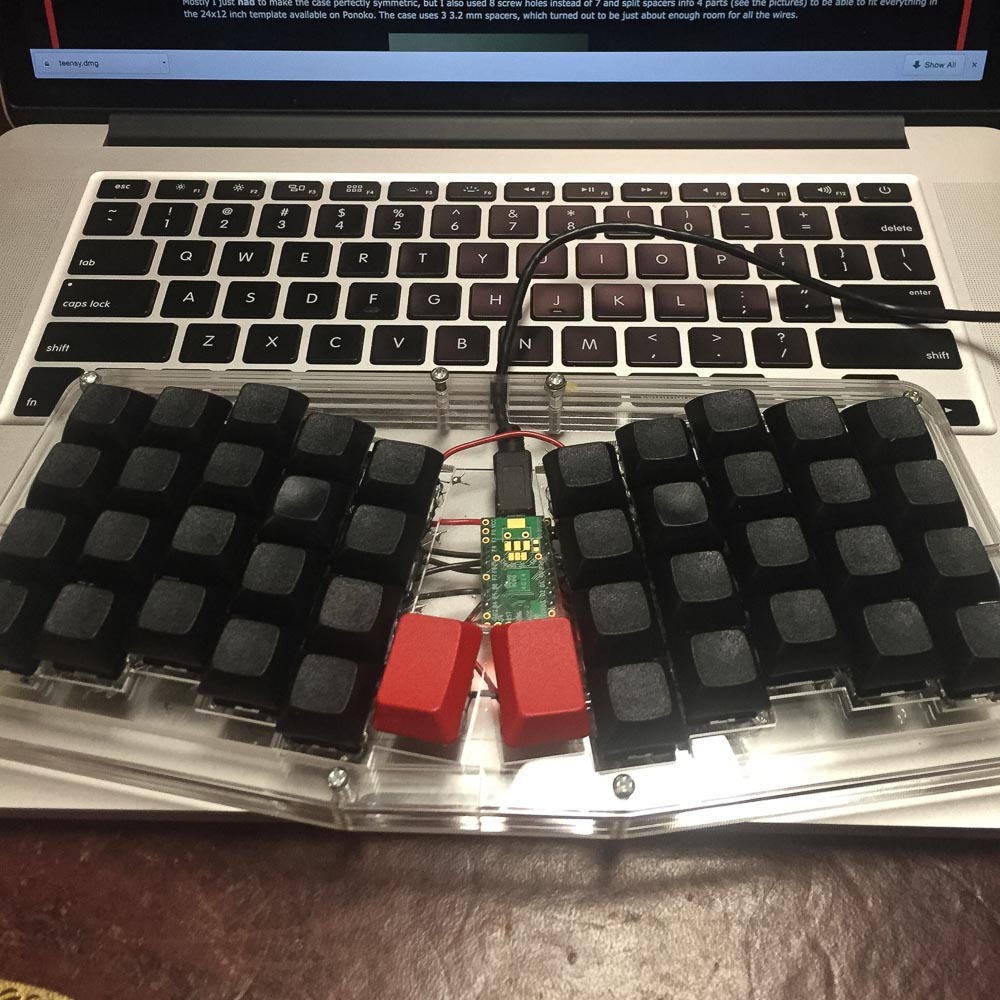 Laptop for scale. Now we’re ready to start hacking.
All told it took me the better part of a day to get my keyboard finished up. I have a lot of experience soldering so if you’re just getting started then you’ll want to take your time and test your connections with a multimeter as you go.
Flashing firmware.
In order to keep things simple I initially loaded up Phil’s firmware. The toolchain is standard avr tools and the repos README walks you through how to get it all set up. The standard Atreus firmware works great, however I wanted to play with some more powerful macros so I decided to give TMK a try.
TMK is, from what I can tell, the community choice for customizing keyboard firmware. Its very feature complete and has support for several useful macros like click vs. hold keys, macros, and layers. Technomancy has a fork of the tmk library with the atreus included and it works well with a teensy. Uploading it works the same way that the original firmware does. I cut my own fork off of Technomancie’s version and included my custom layout if you want to check it out.
I ended up tweaking the original layout quite a bit changing the original symbol pad/num pad layout to be a more standard number row and symbol row layout. I also take advantage of several click or hold macros.
My suggestion is to keep things simple at first and start to add customizations as you go. Don’t go overboard all at once because you won’t remember half of what you programmed in there anyway.
After thoughts
I’ve been using my Atreus at the office for a few weeks now and I’m really enjoying it. The columnar layout is quite comfortable and I love being able to add customizations and macros to optimize my workflow. If I could go back I would most certainly go with mx cherry browns over the clears. However, despite my poor choice in switches, I’m happy with how it turned out. A huge thanks to Technomancy for designing such a great keyboard and making it available to the public. Make sure to send him some thanks if you decide to build your own!